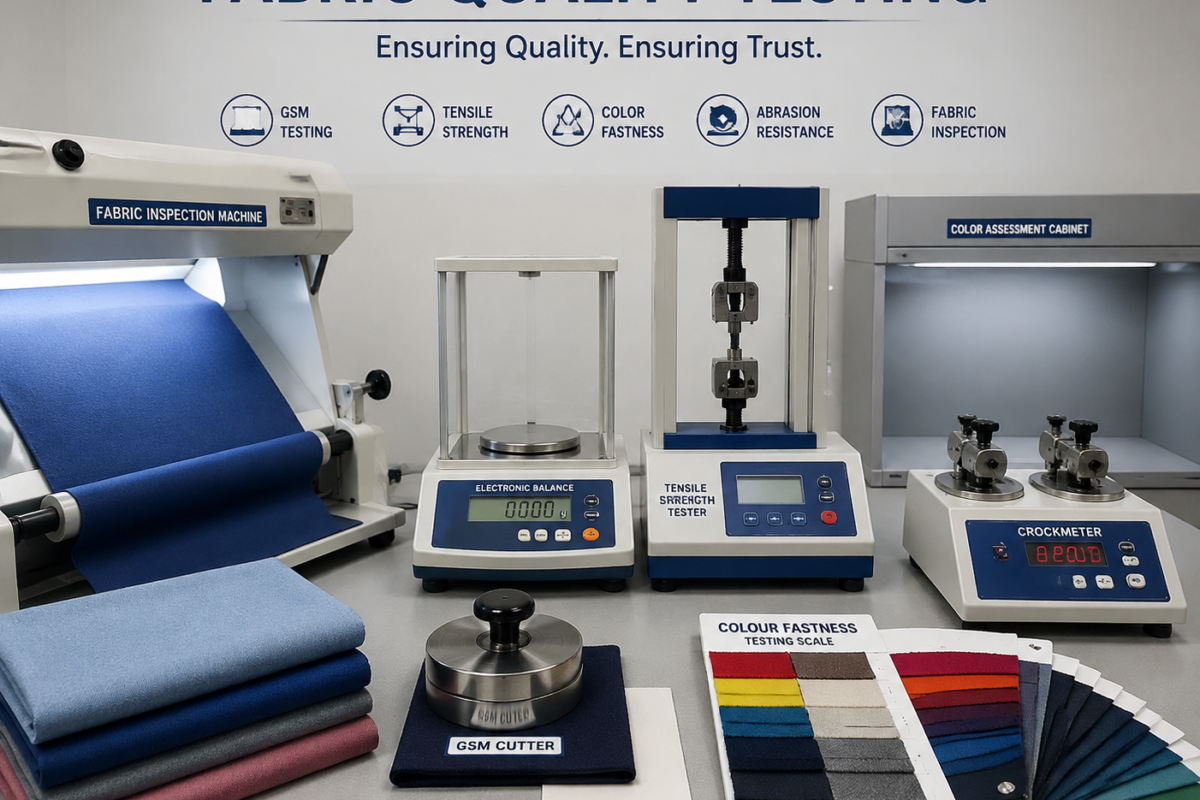
Fabric Quality Testing

Textile Testing Methods: A Complete Guide to Fabric Quality Testing

Introduction

The quality of a textile product is determined long before the finished garment reaches the customer. Every stage of textile production, from fibre selection and yarn manufacturing to fabric processing and garment production, can influence the final quality and performance of the material. This is why textile testing methods play an important role in the modern textile and apparel industry.

Textile testing helps manufacturers measure important fabric properties such as weight, strength, colour fastness, shrinkage, abrasion resistance, moisture, dimensional stability and overall appearance. By testing these properties before and during production, manufacturers can identify quality issues early and reduce the risk of product rejection, customer complaints and unnecessary production losses.

For garment manufacturers, textile exporters, buying houses and quality-control laboratories, fabric quality testing is also important for meeting buyer specifications and applicable testing standards.

This complete guide explains the major textile testing methods, the importance of fabric testing and the equipment commonly used in textile quality-control laboratories.

What Is Textile Testing?

Textile testing is the process of evaluating the physical, mechanical and performance characteristics of fibres, yarns, fabrics and finished garments.

The purpose of testing is to determine whether a textile material meets the required quality specifications for its intended application.

For example, a fabric used for sportswear may need to be tested for moisture-related performance and durability, while upholstery fabric may require abrasion and strength testing. Similarly, export garments may need to meet specific buyer requirements related to colour fastness, shrinkage and dimensional stability.

Common textile properties evaluated during testing include:

  • Fabric weight
  • Tensile strength
  • Tear strength
  • Bursting strength
  • Colour fastness
  • Abrasion resistance
  • Pilling resistance
  • Shrinkage
  • Fabric appearance
  • Dimensional stability
  • Moisture content
  • Fibre properties

A systematic testing process helps manufacturers make quality decisions based on measurable results rather than visual judgement alone.

Why Is Fabric Quality Testing Important?

Fabric quality directly affects the performance, appearance and durability of finished garments and textile products.

Without proper testing, defects may remain undetected until after garments have been produced or delivered. At that stage, correcting the problem can become expensive.

The major benefits of textile testing include:

1. Maintaining Consistent Product Quality

Testing helps manufacturers monitor whether fabrics from different production batches meet the same required specifications.

Even small variations in fabric weight, strength or colour can affect the consistency of the final product.

2. Detecting Defects Early

Testing can identify potential problems before bulk production or shipment.

Early defect detection can reduce:

  • Material wastage
  • Rework
  • Production delays
  • Customer complaints
  • Product returns

3. Meeting Buyer Requirements

Many textile manufacturers and exporters work according to specific buyer specifications. Textile testing provides measurable information that can help verify whether the product meets those requirements.

4. Improving Product Durability

Strength, abrasion and other performance tests help manufacturers understand how a material may perform during use.

5. Supporting Quality-Control Systems

Regular testing creates a more structured quality-control process and helps manufacturers monitor production consistency.

Major Textile Testing Methods

1. Fabric GSM Testing

One of the most common textile testing methods is GSM testing.

GSM stands for Grams per Square Metre. It indicates the weight of a fabric over a defined area.

For example, a fabric with a GSM of 200 weighs approximately 200 grams per square metre.

Fabric GSM can influence several characteristics, including:

  • Fabric thickness
  • Fabric feel
  • Material cost
  • Durability
  • Suitability for specific applications

A typical GSM testing process involves cutting a fabric sample with a known area and measuring its weight using a precision balance.

Common equipment used includes:

  • GSM Cutter
  • GSM Testing Machine
  • Precision Weighing Balance

Accurate sample preparation is important because an incorrectly sized sample can affect the final calculation.

GSM testing is widely used by textile mills, garment manufacturers, fabric suppliers and quality-control laboratories. Amith Garment Services supplies GSM testing equipment designed for fabric quality-control applications.

2. Tensile Strength Testing

Tensile strength refers to the ability of a textile material to withstand pulling forces before breaking.

A Tensile Strength Tester applies controlled force to a fabric sample and measures how the material responds to the load.

This test can help evaluate:

  • Fabric strength
  • Breaking force
  • Material durability
  • Performance under mechanical stress

Tensile testing is particularly important for fabrics used in garments, industrial textiles and applications where mechanical strength is required.

Both woven and knitted fabrics may be tested using appropriate procedures and sample preparation methods.

A Universal Testing Machine or specialised tensile testing equipment may be used for evaluating mechanical properties.

3. Bursting Strength Testing

Bursting strength testing is used to determine how much pressure a fabric can withstand before rupture.

This method is particularly useful for fabrics where strength is applied in multiple directions rather than only in one direction.

Bursting strength testing is commonly used for:

  • Knitted fabrics
  • Stretch fabrics
  • Non-woven textiles
  • Technical textiles

During testing, pressure is gradually applied to the fabric sample until the material bursts. The force or pressure required to cause rupture is recorded.

The results can help manufacturers compare fabric performance and identify variations between production batches.

4. Tear Strength Testing

Tear strength testing measures the resistance of a fabric to the propagation of a tear.

A fabric may initially have good tensile strength but still perform poorly if a small cut or tear spreads easily.

Tear strength testing can be useful for evaluating:

  • Workwear
  • Denim
  • Outdoor fabrics
  • Industrial textiles
  • Upholstery materials

The test helps manufacturers understand how well a fabric may resist damage during handling and use.

5. Colour Fastness Testing

Colour fastness testing evaluates how well a textile retains its colour when exposed to different conditions.

Colour changes or colour transfer can affect the appearance and quality of garments.

Common colour fastness tests include:

  • Wash fastness
  • Rubbing fastness
  • Perspiration fastness
  • Light fastness

Why Is Colour Fastness Important?

Poor colour fastness can result in:

  • Fading
  • Colour bleeding
  • Staining of other garments
  • Customer complaints

Colour fastness testing helps manufacturers evaluate the performance of dyes and finishing processes.

Testing equipment may include washing fastness testers, crock meters and controlled lighting systems depending on the type of evaluation required.

6. Crocking or Rubbing Fastness Testing

Crocking is the transfer of colour from one textile surface to another due to rubbing.

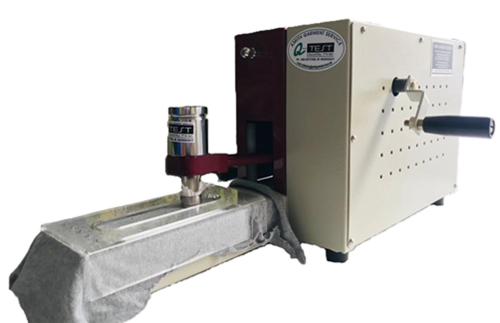
A Crock Meter is commonly used to evaluate rubbing fastness under controlled conditions.

The test may be performed under:

  • Dry rubbing conditions
  • Wet rubbing conditions

During testing, a standard rubbing material is brought into contact with the textile sample using controlled pressure and movement.

The amount of colour transferred can then be evaluated according to the applicable testing procedure.

Rubbing fastness testing is particularly important for dyed and printed fabrics.

7. Abrasion Resistance Testing

Textiles are frequently exposed to friction during normal use.

Abrasion resistance testing evaluates how well a fabric withstands repeated rubbing and wear.

A Martindale Abrasion Tester is one commonly used instrument for evaluating fabric resistance to abrasion.

The test can help assess:

  • Surface wear
  • Fabric durability
  • Material suitability
  • Resistance to repeated use

Abrasion testing is commonly relevant for upholstery fabrics, workwear, uniforms and frequently used garments.

Repeated rubbing cycles can simulate wear conditions and help compare the durability of different textile materials.

8. Pilling Resistance Testing

Pilling occurs when small balls of tangled fibres develop on the surface of a fabric.

This can negatively affect the appearance of garments, especially after repeated wear and washing.

Pilling resistance testing helps manufacturers evaluate how likely a fabric is to develop pills under controlled conditions.

The results can be useful during:

  • Fabric development
  • Quality control
  • Material comparison
  • Supplier evaluation

Testing can help manufacturers select suitable fibres, yarn constructions and finishing processes.

9. Shrinkage and Dimensional Stability Testing

Many fabrics change dimensions after washing or drying.

Shrinkage testing evaluates changes in the length or width of a textile material after exposure to specified conditions.

Dimensional stability is particularly important because excessive shrinkage can affect:

  • Garment fit
  • Product appearance
  • Size consistency
  • Customer satisfaction

The testing process generally involves marking or measuring a fabric sample before and after the required treatment.

Specialised shrinkage templates and measuring scales can help improve consistency during the evaluation process.

Amith Garment Services provides shrinkage-related testing accessories as part of its fabric testing equipment range.

10. Fabric Inspection

Not every fabric quality issue requires laboratory testing. Visual inspection is also an important part of textile quality control.

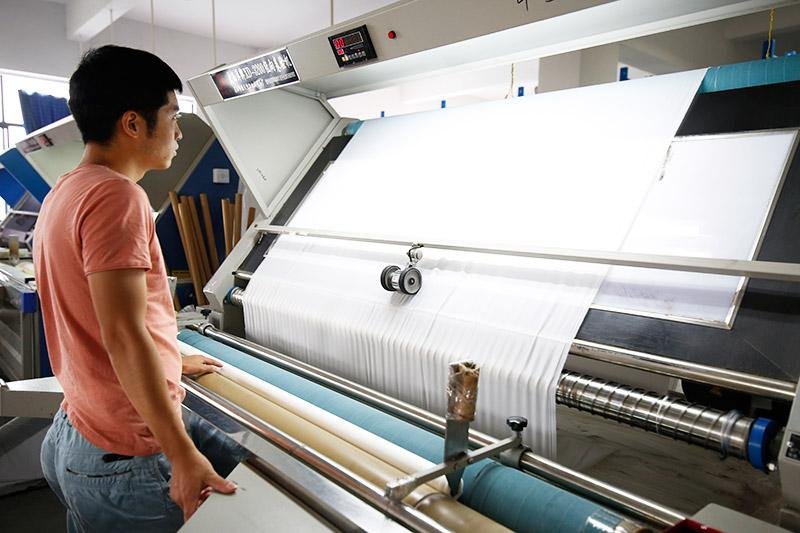
A Fabric Inspection Machine helps manufacturers examine fabric rolls for visible defects.

Common defects may include:

  • Holes
  • Broken yarns
  • Uneven weaving
  • Dyeing defects
  • Printing defects
  • Colour variations
  • Streaks

Fabric inspection machines can also help improve the efficiency of fabric handling and inspection.

Early detection of visible defects can prevent unsuitable fabric from entering the cutting or garment production process.

11. Colour Matching and Visual Evaluation

Colour consistency is critical in textile and apparel production.

A colour that appears correct under one lighting condition may look different under another light source.

Colour matching equipment and controlled lighting systems help quality teams evaluate textile colours under defined viewing conditions.

A Colour Matching Cabinet can be used to examine samples under different lighting environments.

This process can help identify differences between:

  • Production batches
  • Supplier samples
  • Approved standards
  • Finished materials

Consistent colour evaluation can help reduce disagreements caused by subjective visual assessment.

12. Moisture and Fibre Testing

Textile quality testing can begin even before fabric production.

Fibre properties influence yarn quality and the final performance of the fabric.

Common fibre-related evaluations may include:

  • Fibre fineness
  • Fibre length
  • Moisture content
  • Fibre uniformity

Moisture levels can influence textile processing and the accuracy of certain measurements.

Fibre testing helps manufacturers understand the characteristics of raw materials before they enter later production stages.

Essential Equipment for a Textile Testing Laboratory

The exact equipment required depends on the type of textile products being manufactured.

However, a textile quality-control laboratory may include equipment such as:

  • GSM Cutter
  • GSM Weighing Balance
  • Tensile Strength Tester
  • Bursting Strength Tester
  • Crock Meter
  • Colour Matching Cabinet
  • Washing Fastness Tester
  • Martindale Abrasion Tester
  • Fabric Inspection Machine
  • Shrinkage Template
  • pH Meter
  • Moisture Meter
  • Universal Testing Machine

The correct combination of instruments should be selected based on the fabric type, production requirements and applicable testing procedures.

Amith Garment Services provides textile, fabric, yarn and garment testing instruments along with laboratory support and calibration-related services.

Textile Testing Standards

Textile testing procedures may be developed according to recognised standards or specific buyer requirements.

Common standards used in the textile industry include:

  • ISO
  • ASTM
  • AATCC
  • BS
  • Buyer-specific SOPs

The appropriate standard depends on the product, market and testing requirement.

It is important for laboratories to use suitable equipment, sample preparation procedures and test conditions for the method being followed.

How to Choose the Right Textile Testing Equipment

When selecting textile testing equipment, manufacturers should consider more than the initial cost.

Important factors include:

1. Type of Material

The equipment should be suitable for the fabrics or textile materials being tested.

2. Testing Requirements

Identify which properties need to be measured regularly.

3. Applicable Standards

Check whether the testing equipment supports the required testing procedures and specifications.

4. Accuracy and Repeatability

Reliable equipment should provide consistent results when used according to the recommended procedure.

5. Calibration Requirements

Regular verification and calibration can help maintain measurement reliability.

6. Technical Support

Installation assistance, operator training and after-sales support can be important for laboratories using specialised equipment.

Frequently Asked Questions

Textile testing methods are procedures used to evaluate the physical, mechanical, and performance properties of fibres, yarns, fabrics, and garments. These tests help determine textile quality, durability, safety, and compliance with industry requirements.

Fabric quality testing helps manufacturers identify defects, maintain production consistency, evaluate material performance, and ensure fabrics meet required specifications before production or shipment.

GSM testing measures the weight of fabric in grams per square metre. It is commonly used to monitor fabric weight, thickness, consistency, and production quality in textile manufacturing.

Common textile testing equipment includes GSM cutters, weighing balances, tensile strength testers, crock meters, abrasion testers, fabric inspection machines, colour matching cabinets, and other quality control instruments used for fabric and garment testing.

Colour fastness testing evaluates how well a textile retains its colour when exposed to conditions such as washing, rubbing, perspiration, and light. It helps ensure fabrics maintain colour quality during usage and meet buyer requirements.

Fabric inspection helps identify visible defects such as holes, weaving defects, colour variations, and printing problems before materials enter production. This improves quality control, reduces defects, and prevents costly rejections.

Conclusion

Textile testing methods are an essential part of maintaining consistent fabric and garment quality. From GSM measurement and strength testing to colour fastness, abrasion resistance and fabric inspection, each testing method provides valuable information about the performance of a textile material.

A well-planned fabric quality testing process can help manufacturers detect defects earlier, improve production consistency and make informed decisions about materials and processes.

For textile manufacturers, garment exporters and quality-control laboratories, selecting suitable testing equipment and following appropriate testing procedures are important steps towards building a reliable quality-control system.

Amith Garment Services provides a wide range of textile, fabric and garment testing equipment for quality-control laboratories and manufacturers across India, including GSM testing instruments, tensile strength testers, fabric inspection machines, abrasion testing equipment and other laboratory solutions.
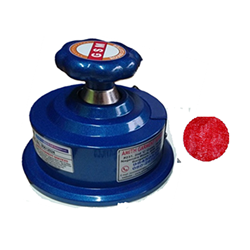
GSM Testing Machine

GSM Testing Machine: How to Test Fabric GSM Step-by-Step and Avoid Common Testing Errors

Fabric quality is determined by several important parameters, and GSM (Grams per Square Metre) is one of the most commonly measured properties in textile manufacturing and quality control. GSM indicates the weight of fabric per square metre and helps manufacturers maintain consistency in fabric production, garment quality, and material specifications.

A GSM Testing Machine is used to determine the weight of textile materials accurately and efficiently. It is commonly used by textile manufacturers, garment industries, fabric suppliers, quality-control laboratories, and testing facilities.

Accurate GSM testing is important because even a small variation in fabric weight can affect the feel, thickness, appearance, durability, and overall performance of the finished product.

This guide explains how a GSM testing machine works, how to test fabric GSM step-by-step, common testing errors, GSM calculation, testing methods, and how to choose suitable GSM testing equipment for textile applications.


What Is GSM Testing in Textiles?

GSM stands for Grams per Square Metre. It represents the weight of a fabric in grams for an area of one square metre.

For example, if a fabric has a GSM of 180, it means that one square metre of the fabric weighs approximately 180 grams.

GSM testing is performed to:

  • Check fabric weight
  • Maintain production consistency
  • Compare fabrics with required specifications
  • Control fabric quality
  • Verify customer requirements
  • Identify variations between production batches
  • Support textile quality-control procedures

GSM can vary depending on the type of fabric, yarn, construction, finishing process, and manufacturing method.


What Is a GSM Testing Machine?

A GSM Testing Machine is textile testing equipment designed to determine the weight of fabric or other sheet materials in grams per square metre.

A typical GSM testing setup may include a GSM sample cutter and a precision weighing balance.

The cutter is used to obtain a sample with a known area, while the weighing balance measures the sample’s weight. The measured weight can then be used to determine the GSM.

GSM testing equipment can be used for various textile materials, including:

  • Woven fabrics
  • Knitted fabrics
  • Non-woven materials
  • Garment fabrics
  • Textile samples
  • Paper and similar sheet materials, depending on equipment specifications

How Does a GSM Testing Machine Work?

The basic principle behind GSM testing is relatively simple.

First, a fabric sample of a known area is cut using a GSM cutter. The sample is then weighed using a precision balance.

The weight of the sample is used to calculate the fabric’s GSM.

For a standard sample area, the calculation can be simplified because the sample size is already known.

The basic principle is:

GSM = Weight of fabric sample ÷ Area of fabric sample × 10,000

When a standard 100 cm² GSM cutter is used, the calculation becomes:

GSM = Sample weight in grams × 100

For example, if a 100 cm² fabric sample weighs 1.8 grams:

GSM = 1.8 × 100 = 180 GSM

This makes GSM testing quick and convenient for textile quality-control applications.


How to Test Fabric GSM Step-by-Step

Accurate testing requires proper sample preparation and correct handling of the equipment.

Step 1: Select a Representative Fabric Sample

Select a representative portion of the fabric that accurately reflects the material being tested.

Avoid areas that are damaged, heavily creased, contaminated, or otherwise unsuitable for testing.

For production quality control, samples may be taken from different areas or batches according to the company’s testing procedure.

Step 2: Condition the Fabric if Required

Depending on the applicable testing method and laboratory procedure, the fabric may need to be conditioned under controlled atmospheric conditions before testing.

Conditioning can help minimize variations caused by moisture content.

Step 3: Place the Fabric on a Cutting Surface

Lay the fabric flat on a suitable cutting surface.

The material should be positioned without unnecessary folds or distortion.

Step 4: Cut the Sample Using a GSM Cutter

Place the GSM cutter on the fabric and cut the required sample.

A GSM cutter helps produce a sample with a predetermined area, improving consistency during testing.

Care should be taken to ensure that the cutter passes completely through the fabric.

Step 5: Weigh the Fabric Sample

Place the cut sample on a calibrated precision weighing balance.

Record the weight accurately.

The weighing balance should be placed on a stable surface and protected from conditions that could affect the measurement.

Step 6: Calculate the GSM

Use the appropriate formula based on the sample area.

For a 100 cm² sample:

GSM = Sample weight × 100

For example:

  • Sample weight = 2.2 grams
  • Sample area = 100 cm²
  • GSM = 2.2 × 100
  • GSM = 220

Therefore, the tested fabric has a GSM of approximately 220 g/m².

Step 7: Record and Compare the Result

Record the test result and compare it with the required fabric specification.

If the measured GSM falls outside the acceptable tolerance, further investigation may be required.


What Is a GSM Cutter?

A GSM Cutter is a precision cutting device used to cut fabric samples of a predetermined area for GSM testing.

Instead of manually measuring and cutting a fabric sample, a GSM cutter helps create a consistent sample size.

This improves testing efficiency and reduces errors associated with irregular sample dimensions.

A GSM cutter is commonly used together with a precision weighing balance as part of a fabric GSM testing setup.


GSM Testing Machine vs GSM Cutter: What’s the Difference?

These terms are sometimes used interchangeably, but they can refer to different components of the testing process.

GSM Testing Equipment Main Function
GSM Cutter Cuts a sample of predetermined area
Precision Balance Measures the weight of the sample
GSM Testing Setup Combines sample preparation and weighing for GSM determination
Digital GSM Balance Provides digital measurement of sample weight

A GSM cutter alone does not determine the GSM. The cut sample must also be accurately weighed and the result calculated.


Common GSM Testing Errors and How to Avoid Them

Accurate equipment alone does not guarantee accurate results. Testing technique is equally important.

1. Using an Incorrect Sample Size

An incorrectly sized sample can produce an incorrect GSM calculation.

Solution: Use a properly maintained GSM cutter and verify the sample dimensions where required.

2. Cutting Through an Uneven Area

Fabric can have variations in construction or finish.

Solution: Follow a consistent sampling procedure and test representative samples.

3. Weighing an Unconditioned Sample

Moisture can influence the weight of textile materials.

Solution: Follow the applicable conditioning requirements for the testing method.

4. Using an Uncalibrated Balance

An inaccurate balance can directly affect the final GSM result.

Solution: Regularly check and calibrate the weighing equipment according to the manufacturer’s recommendations and laboratory procedures.

5. Allowing Fabric Folds During Cutting

Wrinkles or folds can affect sample cutting.

Solution: Place the fabric flat and avoid unnecessary stretching or compression.

6. Ignoring Equipment Maintenance

Dust, damaged cutting blades, and other equipment issues can affect testing consistency.

Solution: Inspect, clean, and maintain the equipment regularly.

7. Testing Only One Sample

A single measurement may not always represent the entire fabric lot.

Solution: Where required, test multiple representative samples and evaluate the results according to the applicable testing procedure.


Why Accurate GSM Testing Matters in Textile Manufacturing

Fabric GSM can influence several characteristics of textile products.

Fabric Quality

Consistent GSM helps maintain uniformity across production batches.

Garment Appearance

Changes in fabric weight can affect drape, thickness, and appearance.

Production Control

Manufacturers can identify variations during production and take corrective action.

Customer Specifications

Many textile products are manufactured according to specified GSM ranges.

Material Cost

Fabric weight can influence material consumption and production costs.

Product Performance

Depending on the textile application, GSM can influence characteristics such as thickness, durability, comfort, and handling.


GSM Testing for Different Types of Fabrics

The GSM testing process may be applied to different textile structures, including:

Woven Fabric

Woven fabrics are produced by interlacing warp and weft yarns. GSM testing helps manufacturers monitor fabric weight and production consistency.

Knitted Fabric

Knitted fabrics are formed using loops of yarn. Their structure can make sample handling and conditioning particularly important.

Non-Woven Fabric

Non-woven materials are produced through processes other than traditional weaving or knitting. GSM can be an important quality parameter for many non-woven applications.

The exact testing procedure should always follow the relevant standard or specification for the material being tested.


GSM Testing Standards

Textile laboratories and manufacturers may follow recognized testing standards when determining fabric mass per unit area.

Depending on the material and testing requirement, standards may include ASTM and ISO methods, among others.

For example, ASTM D3776/D3776M is associated with mass per unit area of fabric, while ISO 3801 addresses determination of mass per unit length and mass per unit area of fabrics.

The applicable standard should be selected based on the material, customer requirements, laboratory procedure, and intended application.


How to Choose the Right GSM Testing Machine

When selecting GSM testing equipment, consider the following factors:

1. Type of Material

Determine whether the equipment will be used for woven, knitted, non-woven, or other materials.

2. Required Accuracy

Select equipment appropriate for the precision required by your testing application.

3. Sample Size

Check the cutter’s sample area and ensure that it suits your testing procedure.

4. Weighing Capacity

The balance should be suitable for the expected sample weights.

5. Ease of Operation

Simple and user-friendly equipment can improve testing efficiency.

6. Durability

For industrial environments, equipment should be robust enough for regular use.

7. Calibration and Maintenance

Consider the availability of calibration, maintenance, and technical support.

8. Compliance Requirements

If testing is performed according to a specific standard, ensure that the equipment and procedure are appropriate for that standard.


Applications of GSM Testing Equipment

GSM testing equipment is commonly used in:

  • Textile manufacturing
  • Garment manufacturing
  • Fabric inspection
  • Textile quality-control laboratories
  • Research and development
  • Non-woven manufacturing
  • Fabric suppliers
  • Textile testing laboratories
  • Production quality assurance

It can help organizations maintain consistency and verify that materials meet their required specifications.


GSM Testing Machine for Textile Quality Control

A reliable GSM testing setup can become an important part of a textile quality-control process.

By regularly measuring fabric GSM, manufacturers can identify variations before materials move further into production.

For example, if a fabric specification requires a particular GSM range, testing can help determine whether the produced material remains within the required tolerance.

This can reduce quality issues and help manufacturers maintain consistency between batches.

Frequently Asked Questions

A GSM Testing Machine is equipment used to determine the mass per square metre of fabric or other suitable sheet materials.

A representative fabric sample is cut to a known area using a GSM cutter, weighed using a precision balance, and the GSM is calculated from the sample weight and area.

A GSM testing setup generally uses a GSM cutter and precision weighing balance. Digital GSM testing equipment may combine or simplify these functions depending on the design.

GSM represents fabric weight per square metre, while thickness measures the physical thickness of the material. They are different properties and should not be treated as interchangeable.

No. A GSM cutter is used to obtain a sample of a known area. The sample must also be accurately weighed to determine GSM.

GSM helps manufacturers monitor fabric weight, consistency, quality, material specifications, and production requirements.

Calibration requirements depend on the equipment, testing procedure, laboratory requirements, and manufacturer's recommendations. Regular verification and calibration help maintain measurement reliability.

Yes, GSM testing can be applied to many types of textile materials, provided the appropriate sampling and testing procedure is followed.

Conclusion

GSM testing is an essential quality-control process in textile and garment manufacturing. A suitable GSM testing machine, GSM cutter, and precision weighing balance can help manufacturers accurately determine fabric weight and maintain consistency throughout production.

Correct sample preparation, accurate weighing, proper conditioning, equipment maintenance, and adherence to the applicable testing procedure are all important for reliable results.

For textile manufacturers and quality-control laboratories, investing in suitable GSM testing equipment can help improve testing efficiency and support consistent product quality.

If you are looking for reliable textile testing equipment, Amith Garment Services provides a range of textile testing solutions for fabric and garment quality-control applications. Explore the GSM testing equipment range and select the setup appropriate for your testing requirements.

Fabric Rolling Machine troubleshooting for common fabric rolling problems

Fabric Rolling Problems: Common Issues, Causes & Solutions Using a Fabric Rolling Machine

Fabric rolling looks like a simple, final step in textile production, but it has a bigger effect on downstream work than most people expect. A roll that comes off the winding line loose, wrinkled, or misaligned can create problems much later — during inspection, storage, spreading, or cutting — long after anyone remembers what happened on the winding floor. A well-maintained fabric rolling machine is meant to prevent exactly this, yet fabric rolling problems still show up regularly on production floors, from uneven fabric rolls to tension inconsistencies and edge misalignment.

This article looks at why these issues occur, how to trace them back to a root cause, and what operators and quality teams can do to keep roll formation consistent. The goal is practical troubleshooting, not a sales pitch — because a roll that isn’t formed correctly can quietly affect fabric inspection accuracy, transportation, spreading, and eventually garment production.

What Are the Most Common Fabric Rolling Problems?

Most fabric rolling problems fall into a handful of recurring categories. Some are visible immediately after winding; others only become obvious once the roll has been stored for a while or unrolled for cutting.

Fabric Rolling Problem Typical Symptom Possible Cause
Uneven fabric rolls Irregular roll shape Uneven tension or alignment
Fabric roll wrinkles Creases during winding Poor fabric guidance or tension
Loose fabric rolls Soft or unstable roll Insufficient winding tension
Excessively tight rolls Hard or compressed roll Excessive tension
Edge misalignment Fabric edges do not line up Incorrect fabric roll alignment
Telescoping Layers shift sideways Poor edge control or tension
Uneven roll hardness Different firmness across roll Variable tension or winding conditions

This table is a starting point, not a diagnostic checklist. The actual cause behind any of these symptoms depends on the specific machine, the fabric being processed, and the conditions on the shop floor at the time. Two mills running the same fabric on different machines can see different results, which is why troubleshooting has to be specific to the situation rather than applied generically.

How Does a Fabric Rolling Machine Work?

At a basic level, a fabric rolling machine takes fabric from a feeding point, guides it through an alignment mechanism, applies controlled tension, and winds it into a roll. Each stage plays a role in the finished result:

  • Fabric feeding — the fabric is drawn into the machine at a controlled rate.
  • Fabric guidance — guide rollers or edge sensors keep the fabric tracking straight.
  • Tension control — a tensioning system determines how tightly the fabric is wound.
  • Edge alignment — the machine keeps the fabric edges consistent as layers build up.
  • Winding and roll formation — the fabric is wrapped around a core or mandrel, building up the roll.
  • Roll completion — the finished roll is released, often with a wrapper or tape to hold its shape.

The relationship between fabric tension, winding speed, fabric width, alignment, and roll formation is what ultimately determines roll quality. If any one of these variables drifts out of range, the effect usually shows up somewhere in the finished roll. It’s also worth noting that machine design and operating procedures vary between manufacturers and models, so settings that work well on one machine may need adjustment on another.

Fabric Rolling Problems Caused by Incorrect Tension

Tension is one of the most common sources of fabric rolling tension problems, and it works in both directions — too little and too much cause different but equally frustrating issues.

Low tension during winding can lead to:

  • Loose rolls that lose shape during handling
  • Poor roll stability during transport
  • Wrinkles forming as layers shift
  • Layer shifting or telescoping
  • Uneven roll formation overall

Excessive tension, on the other hand, can result in:

  • Overly compact, hard rolls
  • Fabric distortion or stretching
  • Edge damage or curling
  • Potential harm to delicate or stretch fabrics

Because different fabrics respond differently to tension, operators should set tension according to the specific material being processed rather than applying one standard setting across every fabric type. A setting that works well for a heavy woven fabric may be too aggressive for a lightweight knit.

Uneven Fabric Rolls and Fabric Roll Alignment Problems

Uneven fabric rolls are one of the most frequently reported fabric rolling machine problems, and they rarely have a single cause. Common contributors include:

  • Incorrect fabric roll alignment at the start of winding
  • Uneven fabric feeding into the machine
  • Edge guide sensors that are misaligned or poorly calibrated
  • Inconsistent fabric width along the length of the piece
  • Operator handling during loading
  • Improper machine setup for the fabric being run
  • Unequal tension across the width of the fabric

Fabric roll alignment refers to how consistently the fabric edges line up as the roll builds. Even a small alignment error at the beginning of a roll tends to compound as more layers are added, so accurate edge positioning matters from the very first wrap. Because of this, alignment should be checked periodically throughout a production run, not just when the machine is first set up.

Fabric Roll Wrinkles and Surface Defects

Fabric roll wrinkles are often the easiest defect to spot but not always the easiest to trace. Typical causes include:

  • Incorrect tension settings
  • Poor fabric guiding through the winding zone
  • Fabric entering the winding area at a slight angle
  • Uneven feeding speed
  • Improper machine settings for the fabric type
  • Fabric-specific characteristics, such as a tendency to curl or shift

A practical way to narrow down the cause is to watch the fabric at each stage — feeding, guiding, and winding — rather than only inspecting the finished roll. If a wrinkle appears consistently at the same point in the fabric path, that stage is usually where the correction needs to happen.

Fabric Winding Problems and Roll Defects

Beyond tension and alignment, several other fabric winding problems can affect the finished roll, including loose winding, overly tight winding, telescoping, uneven edges, soft spots, hard spots, layer displacement, and irregular roll shape. These fabric roll defects don’t just affect appearance — they can make later handling more difficult, from how easily a roll can be lifted and stored to how accurately it can be spread and cut.

Fabric Rolling Machine Troubleshooting: A Practical Approach

When a problem shows up, it helps to start with the simplest checks before assuming a major mechanical issue is involved.

Problem Possible Cause Recommended Check
Loose roll Low tension Check tension setting and fabric feed
Tight roll Excessive tension Review tension and winding pressure
Wrinkles Poor guiding Inspect fabric path and alignment
Uneven edges Misalignment Check edge guide and fabric positioning
Telescoping Side movement Inspect alignment and tension consistency
Uneven roll hardness Variable tension Check tension across the winding process
Irregular roll shape Feeding or alignment issue Inspect machine setup and fabric entry

Working through simple checks first — tension setting, fabric path, edge guides — usually resolves the issue without needing to adjust deeper machine settings. Jumping straight to major adjustments can sometimes introduce a new problem while trying to fix the original one.

How to Prevent Textile Fabric Rolling Problems

Most textile fabric rolling problems are easier to prevent than to fix after the fact. Useful preventive habits include:

  • Setting up the machine correctly for each fabric type
  • Applying appropriate, fabric-specific tension
  • Cleaning rollers and guides regularly
  • Verifying fabric alignment before and during runs
  • Carrying out routine inspection of rolls during production
  • Training operators on machine settings and fabric handling
  • Following a preventive maintenance schedule
  • Checking fabric width consistency
  • Monitoring roll formation as the roll builds
  • Following manufacturer instructions for the specific machine

Preventive maintenance matters because small mechanical issues — a slightly worn roller, a drifting sensor — tend to produce inconsistent results long before they cause a visible breakdown.

How Fabric Type Affects Rolling Performance

Not all fabrics behave the same way on a rolling machine. Factors that influence performance include fabric weight, stretch, surface structure, thickness, slipperiness, width variation, fabric construction, and finishing treatment. A slippery synthetic fabric, for example, may need different edge control than a heavier cotton woven. Rolling conditions should be adjusted to the material being processed rather than assuming a single machine setting works for every fabric that comes through.

Choosing the Right Fabric Rolling Machine

For manufacturers evaluating equipment, useful considerations include fabric width range, compatibility with different fabric types, roll diameter requirements, tension control options, edge alignment features, speed control, ease of operation, maintenance requirements, expected production volume, availability of technical support, and overall machine construction and reliability. These factors matter more than any single specification, since the right machine depends on the fabrics and production volumes a facility actually handles.

Why Proper Fabric Rolling Matters in Textile Quality Control

Fabric rolling connects directly to textile quality control, even though it’s often treated as a packaging step. A properly formed roll supports accurate fabric inspection, consistent material handling, smoother cutting preparation, safer storage, easier transportation, and better production planning. When rolls are uneven, wrinkled, or misaligned, the effects tend to ripple forward — inspection takes longer, spreading becomes less accurate, and cutting teams may need to account for defects that could have been avoided earlier in the process.

Why Choose Amith Garment Services

Amith Garment Services supplies textile and garment testing equipment and related machinery to manufacturers, exporters, and quality-control teams. The company’s product range spans fabric testing and inspection equipment that supports the kind of quality-control workflow described above — from evaluating fabric properties before processing to verifying finished fabric quality before it moves into garment production. For manufacturers looking to address fabric rolling problems as part of a broader quality-control approach, understanding how rolling connects to inspection, testing, and handling is a useful starting point.

If your production process regularly deals with uneven fabric rolls, tension inconsistencies, or other fabric rolling machine problems, working through the fabric path systematically — feeding, guiding, tensioning, and winding — is usually more effective than replacing equipment outright. A well-maintained fabric rolling machine, paired with consistent operator practices, remains one of the most reliable ways to keep roll quality consistent across a production run.

Frequently Asked Questions:

A Fabric Rolling Machine is used to wind finished fabric into neat, stable rolls after processing, inspection, or finishing. It controls fabric tension and alignment to create uniform rolls suitable for storage, transportation, spreading, and cutting.

Uneven fabric rolls are usually caused by inconsistent tension, misaligned fabric edges, or uneven feeding during winding. Variations in fabric width and incorrect machine setup can also contribute to uneven roll formation.

To prevent wrinkles, ensure the fabric enters the winding zone straight, keep guiding rollers properly aligned, and set the correct tension for the fabric type. Regular inspection during production can also help identify wrinkling at an early stage.

Start by checking fabric tension, feeding consistency, and edge alignment. A loose roll may indicate insufficient tension, while telescoping can be related to alignment problems. Checking these basic factors before changing advanced machine settings can help identify the problem efficiently.

An uneven fabric roll is commonly caused by inconsistent tension or misaligned edges during winding. Uneven feeding speed and changes in fabric width can also cause the roll to build unevenly.

Make sure the fabric feeds straight into the winding zone, the guiding rollers are correctly aligned, and the tension is suitable for the fabric. Inspecting the roll during production can help detect wrinkles before they affect the entire roll.

Begin with the three main checks: tension, fabric feeding, and alignment. Identify the type of roll defect and match it to the most likely cause before making major machine adjustments.

Crock meter diagram showing the main parts of a crock meter used for rubbing fastness testing

Crock Meter Diagram: Parts and Function

Anyone who has spent time in a textile testing lab knows that a fabric can look perfect on the rack and still fail a buyer’s compliance check within minutes of rubbing fastness testing. This is where a clear understanding of the crock meter diagram becomes genuinely useful — not as a theoretical drawing, but as a practical map of how colour transfer gets measured, verified, and documented before a garment ships.

For textile laboratories, garment manufacturers, and quality-control teams, the crock meter diagram connects several ideas at once: how the crock meter itself is built, how rubbing fastness is generated mechanically, and why that mechanical action translates directly into a colour fastness rating a buyer can trust. Once you understand the diagram, interpreting test results — and troubleshooting inconsistent ones — becomes far more intuitive.

What Is a Crock Meter?

A crock meter is a mechanical testing instrument used to evaluate how well a textile’s colour resists transferring onto another surface through rubbing, a phenomenon commonly called “crocking.” It works by rubbing a piece of standard test cloth against a fixed fabric specimen under controlled pressure and a set number of strokes, then assessing how much colour has migrated onto that test cloth.

The instrument is typically used on dyed, printed, or finished fabrics — including denim, apparel fabric, upholstery textiles, and home furnishings. Rubbing is performed because everyday handling, wear, and friction can loosen surface dye particles that were not properly fixed during dyeing or finishing. Colour transfer is evaluated visually or instrumentally against a grey scale, which grades how much staining occurred on the rubbing cloth. Crock meters are commonly found in textile testing laboratories, garment quality-control departments, dye houses, and buying house inspection units.

What is a crock meter used for? A crock meter is used for testing a fabric’s colour fastness to rubbing. It rubs a standard cloth against a specimen under controlled pressure and stroke count, then measures how much dye transfers onto the rubbing cloth, helping labs assess dry and wet crocking performance.

Crock Meter Diagram: Main Parts and Their Functions

A typical crock meter diagram breaks the instrument down into a handful of functional components. While exact construction can vary between manufacturers and models, most crock meters share a similar layout built around a base, a specimen mounting area, and a rubbing mechanism.

The base or support platform anchors the entire assembly and keeps the testing surface stable during operation. The specimen holder secures the fabric sample flat against the base so it doesn’t shift while being rubbed. A fabric clamping arrangement works alongside the holder to keep the specimen taut and correctly positioned throughout the test cycle.

The rubbing finger, sometimes called the rubbing head, is the component that makes direct contact with the specimen. A standard rubbing cloth — typically a specified cotton test cloth — is mounted onto this finger and receives any colour that transfers during rubbing. The operating arm connects to the rubbing finger and produces the back-and-forth rubbing motion, usually driven by a crank or handle on manual units, or a motor on automated ones.

A counter helps the operator track and control the number of rubbing cycles, since test methods specify an exact stroke count. The weight or loading mechanism applies the specified contact pressure between the rubbing finger and the specimen — consistent pressure is essential for repeatable results. A guide mechanism keeps the rubbing motion travelling in a straight, consistent path across the sample mounting area.

Crock Meter Part Function
Specimen Holder Holds the textile specimen securely
Rubbing Finger Applies controlled rubbing contact
Rubbing Cloth Receives transferred colour
Operating Arm Produces the rubbing movement
Counter Helps control the number of rubbing cycles
Base Supports the testing assembly
Loading Mechanism Applies the specified contact pressure

Each part depends on the others: the base and holder keep the specimen still, the loading mechanism sets the pressure, the operating arm and rubbing finger generate motion, and the rubbing cloth captures the evidence — the transferred colour — that gets evaluated afterward.

How Does a Crock Meter Work?

The operating principle behind a crock meter is straightforward once you follow it step by step:

  1. Prepare the textile specimen according to the applicable test method.
  2. Mount the specimen securely onto the specimen holder.
  3. Place the specified rubbing cloth onto the rubbing finger.
  4. Apply the required contact pressure using the loading mechanism.
  5. Move the rubbing head across the specimen for the specified number of cycles.
  6. Remove the rubbing cloth once testing is complete.
  7. Assess colour transfer on the rubbing cloth using the applicable grey scale or evaluation procedure.

Consistency matters at every one of these steps. Contact pressure, rubbing direction, stroke count, and sample preparation all directly influence the result — a slightly loose specimen or an uneven number of strokes can shift a fabric from a passing grade to a failing one, even when the fabric itself hasn’t changed.

How does a crock meter work? A crock meter works by rubbing a standard test cloth against a mounted fabric specimen under fixed pressure for a set number of strokes. The rubbing cloth is then examined for colour transfer, which is graded against a standard grey scale to determine the fabric’s rubbing fastness rating.

Crock Meter Diagram and Rubbing Fastness Test

Every component shown in a crock meter diagram plays a direct role in the rubbing fastness test. The rubbing finger and loading mechanism generate mechanical abrasion on the fabric surface. This abrasion can dislodge dye particles that weren’t fully fixed during dyeing, allowing them to migrate onto the rubbing cloth — a process linked closely to fabric surface characteristics and dyestuff migration behaviour.

Rubbing fastness testing is generally performed under two conditions: dry rubbing and wet rubbing. Dry crocking uses a dry rubbing cloth and reflects how colour behaves under ordinary friction, like a bag strap rubbing against a garment. Wet crocking uses a rubbing cloth moistened according to the test method, simulating conditions such as perspiration or damp handling, where moisture can make it easier for dye to transfer. Evaluating both conditions gives a fuller picture of a fabric’s real-world colour stability.

Dry Crock Test vs Wet Crock Test

Feature Dry Crock Test Wet Crock Test
Rubbing Cloth Dry Moistened under the specified procedure
Main Purpose Evaluates dry rubbing colour transfer Evaluates colour transfer under wet conditions
Moisture Not intentionally introduced Controlled moisture is involved
Application General rubbing performance Conditions where moisture can influence colour transfer

Moisture can sometimes make dye particles easier to dislodge from a fabric surface, which is why wet crock results are often watched closely for darker or heavily dyed fabrics such as denim. That said, this isn’t a fixed rule — wet rubbing does not always produce a lower fastness rating than dry rubbing, since the outcome depends on the specific dye, fibre, and finishing used on that fabric.

What is the difference between dry and wet crock testing? Dry crock testing rubs a dry cloth against the fabric to evaluate ordinary friction-related colour transfer. Wet crock testing uses a moistened rubbing cloth to simulate conditions like perspiration or dampness. Both tests help labs understand how a fabric’s colour holds up under different real-world handling conditions.

International Standards for Crock Meter Testing

Two standards commonly guide crock meter testing: ISO 105 X12, an internationally recognised method for assessing colour fastness to rubbing, and the AATCC 8 Test Method, widely used in North American textile testing for the same purpose. Both describe the general procedure for dry and wet crocking, though their specified conditions — such as rubbing cloth type, stroke count, and evaluation criteria — can differ in detail.

Laboratories should always consult the current applicable edition of whichever standard their buyer or market requires, rather than relying on generic machine settings. Requirements such as the number of rubbing cycles, applied pressure, specimen preparation, rubbing cloth type, and evaluation procedure should be controlled precisely according to the selected standard to ensure the result is valid and comparable.

Which standards are used for crock meter testing? Crock meter testing is commonly guided by ISO 105 X12, an international method for colour fastness to rubbing, and the AATCC 8 Test Method, widely used in North America. Both cover dry and wet crocking procedures, though exact parameters vary, so labs should follow the specific edition required by their buyer.

Why Is a Crock Meter Used for Textile Quality Control?

Rubbing fastness testing has practical applications across fabric manufacturing, garment manufacturing, denim production, dyed and printed textiles, home textiles, upholstery, and general apparel. Export-focused units and buying houses rely on crock meter results as part of routine compliance testing before shipments are approved.

Catching a colour-transfer problem at the fabric or garment stage — rather than after a customer complaint — protects both the manufacturer’s reputation and the buyer relationship. This is one reason rubbing fastness testing is treated as a standard checkpoint rather than an optional one in most export-oriented quality-control programs.

Factors That Affect Rubbing Fastness Results

Several practical factors influence rubbing fastness outcomes: fabric construction, fibre type, dye selection, dye fixation quality, fabric finishing, and surface texture all play a role in how easily colour transfers. Test-side variables matter just as much — moisture content, rubbing pressure, number of rubbing cycles, rubbing cloth condition, sample preparation, operator technique, and the general condition of the instrument itself can all shift results.

Because so many variables are involved, poor test control can affect repeatability even when the fabric being tested hasn’t changed. This is why consistent instrument maintenance and disciplined test procedure matter as much as the fabric’s actual dye quality.

How to Read a Crock Meter Diagram Correctly

For a lab technician or textile student, the easiest way to read a crock meter diagram is to follow the functional sequence it represents:

Sample → Holder → Rubbing Finger → Rubbing Cloth → Controlled Movement → Colour Transfer → Evaluation

Each mechanical component in the diagram corresponds to a step in that sequence, and understanding this flow makes it much easier to diagnose an unexpected result — for instance, checking whether the holder is secure or the loading mechanism is applying correct pressure. A diagram is a helpful reference, but it should always be used alongside the instrument’s operating instructions and the applicable test standard rather than as a stand-alone guide.

Where Is Crock Meter Testing Used?

Crock meter testing is a routine part of textile and garment quality control across India’s manufacturing hubs, including centres like Bangalore and Tiruppur, where fabric mills, garment export units, and textile testing laboratories operate at scale. Buying houses and quality-control departments across the country rely on consistent rubbing fastness data to meet the compliance expectations of international buyers.

Given how central textile and garment exports are to India’s manufacturing economy, reliable colour fastness testing plays a meaningful role in maintaining product quality and buyer confidence at scale.

Choosing the Right Crock Meter

Selecting a crock meter involves more than picking any available unit. Buyers should evaluate compatibility with the testing standards they need to follow, overall construction quality, and repeatability of results across repeated tests. Ease of operation, a reliable counter mechanism, and a well-designed loading arrangement all affect day-to-day usability in a busy lab.

It’s also worth considering rubbing head design, calibration requirements, and whether the supplier offers technical support when questions arise. Laboratory workload, documentation needs, and after-sales service are practical, ongoing considerations — not just one-time purchase factors.

Why Choose Amith Garment Services for Textile Testing Equipment?

Amith Garment Services works with textile testing equipment, garment testing instruments, and fabric testing equipment suited to the practical needs of textile laboratories and quality-control teams. Along with crock meters, the equipment range extends to instruments used across the broader testing workflow, including light booths, colour matching cabinets, washing fastness testers, GSM cutters, fabric inspection machines, bursting strength testers, and fabric rolling machines.

For labs looking for technical guidance on selecting or maintaining testing instruments, Amith Garment Services provides product information geared toward real laboratory requirements rather than generic specifications. More details on the full equipment range are available at amithgarmentservices.com.

Conclusion

A crock meter is a focused, reliable instrument for evaluating how well a fabric’s colour resists rubbing, and the crock meter diagram is simply a practical guide to how its parts — the holder, rubbing finger, rubbing cloth, operating arm, and loading mechanism — work together to produce that result. Understanding dry versus wet crocking, following the relevant ISO 105 X12 or AATCC 8 procedure, and controlling variables like pressure and stroke count all contribute to consistent, trustworthy rubbing fastness data. For textile laboratories and garment manufacturers alike, keeping a clear mental picture of the crock meter diagram makes day-to-day testing and troubleshooting considerably easier.

Frequently Asked Questions

A crock meter diagram is a labelled illustration that shows the working parts of a crock meter — including the base, specimen holder, rubbing finger, rubbing cloth, operating arm, and loading mechanism. It helps lab technicians and students understand how each part contributes to the rubbing fastness testing process, from mounting the fabric specimen to generating controlled rubbing motion and assessing colour transfer afterward.

A crock meter is used for evaluating a textile's colour fastness to rubbing, also known as crocking. It works by rubbing a standard test cloth against a fabric specimen under fixed pressure for a specified number of strokes, then assessing how much colour transferred onto the rubbing cloth. It's commonly used on dyed, printed, and finished fabrics across garment and textile manufacturing.

The main parts of a crock meter typically include the base, specimen holder, fabric clamping arrangement, rubbing finger, standard rubbing cloth, operating arm, crank or handle, counter, and loading mechanism. Exact construction can vary between manufacturers and models, but these components generally work together to hold the specimen, apply controlled pressure, and generate consistent rubbing motion during testing.

Dry crock testing uses a dry rubbing cloth to evaluate how a fabric's colour transfers under ordinary friction, while wet crock testing uses a rubbing cloth moistened according to the applicable test method, simulating conditions like perspiration or dampness. Both tests are important because moisture can influence how easily dye particles dislodge from certain fabrics, giving labs a fuller picture of real-world colour stability.

A crock meter is used to test how well a fabric's colour resists rubbing off onto other surfaces, which helps labs check for colour fastness before garments go to buyers.

It rubs a standard test cloth against a fabric sample under set pressure and stroke count, then checks how much colour transferred using a grey scale.

It shows the crock meter's parts, like the rubbing finger, specimen holder, and operating arm, and how they work together during testing.

It helps manufacturers catch colour-transfer problems before garments reach customers, protecting product quality and buyer trust.

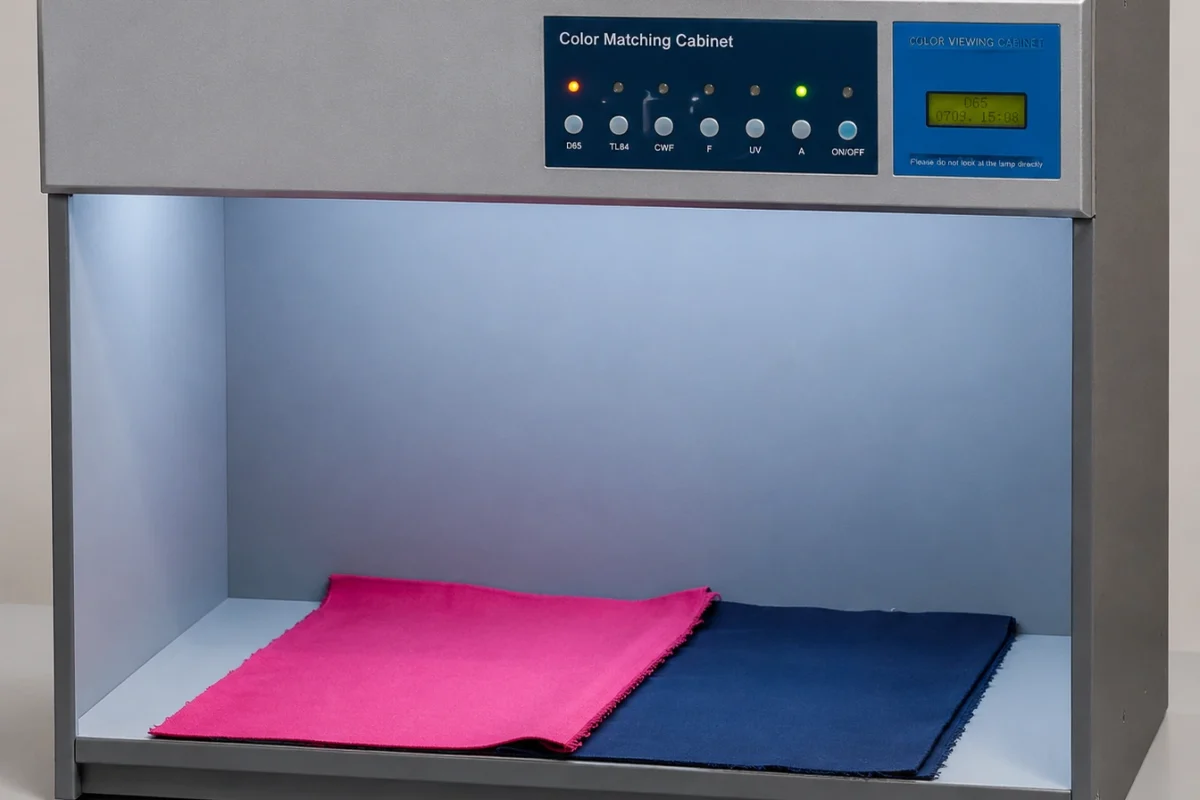
Color Matching Cabinet used for fabric color testing in textile laboratory

Color Matching Cabinet: Complete Guide to Textile Color Testing

Color consistency is one of the first things buyers notice when they inspect a fabric or finished garment. A shade that looks correct under one lighting condition can appear noticeably different under another. This is why professional textile laboratories and quality-control teams use a Color Matching Cabinet for controlled visual color evaluation.

A Color Matching Cabinet provides a standardized viewing environment in which fabric, yarn, trims, garments, plastics, paints, and other colored materials can be compared under different light sources. It helps reduce subjective judgment and makes color approval more consistent between suppliers, manufacturers, buyers, and testing teams.

For textile manufacturers and exporters in India, particularly production centers such as Bangalore and Tiruppur, controlled color evaluation can be an important part of maintaining product consistency.

What Is a Color Matching Cabinet?

A Color Matching Cabinet is a laboratory instrument designed to provide controlled and standardized illumination for visual comparison of colors. Instead of examining a fabric under changing room lights or natural daylight, the operator evaluates samples inside a dedicated viewing environment.

The cabinet contains selected light sources that simulate different lighting conditions. This allows a quality-control professional to determine whether two samples genuinely match or whether their appearance changes when the illumination changes.

Why Is a Color Matching Cabinet Important?

Color approval is rarely as simple as placing two fabric samples next to each other. The surrounding environment, type of illumination, viewing angle, surface characteristics, and even the observer can influence how a color is perceived.

A controlled cabinet reduces some of these variables. Instead of relying on ordinary office lighting or inconsistent daylight, the operator can compare samples under defined illumination conditions.

A Color Matching Cabinet is particularly useful during:

  • Lab-dip approval
  • Bulk fabric inspection
  • Shade matching
  • Yarn color comparison
  • Garment panel checking
  • Trim and accessory approval
  • Buyer sample comparison
  • Production quality control
  • Final inspection

For textile exporters, consistent color evaluation can also make communication easier between a dyeing unit, garment manufacturer, buying house, and overseas customer.

How Does a Color Matching Cabinet Work?

The basic principle is straightforward. The operator places the test specimens and reference standard inside the viewing area and selects the required light source.

The samples are then visually compared under controlled illumination. If required, the operator changes to another light source and repeats the comparison.

This process is particularly useful for identifying metamerism. Metamerism occurs when two samples appear to have a similar color under one light source but show a noticeable difference under another.

Typical operating sequence

  1. Clean the viewing area and make sure the light sources are functioning correctly.
  2. Place the reference sample and production sample in the viewing area.
  3. Position the samples consistently for comparison.
  4. Select the required standard light source.
  5. Compare shade, hue, depth, and visible color difference.
  6. Change to another relevant light source.
  7. Record the observation according to the laboratory’s quality-control procedure.
  8. Take corrective action if the samples do not meet the approved shade requirement.

Important: A viewing cabinet supports visual assessment; it does not replace instrumental color measurement when a specification requires numerical color data.


Different Light Sources Used for Color Evaluation

Different light sources represent different viewing environments. The exact configuration varies between instruments and laboratory requirements.

Common sources used in color evaluation include:

Light Source Typical Application
D65 Artificial daylight simulation
TL84 Common commercial/store lighting simulation
CWF Cool white fluorescent environment
UV Examination of fluorescent or optical brightening effects
Tungsten / Incandescent Warm indoor lighting conditions

D65 is especially relevant when daylight-like evaluation is required. Other sources can reveal differences that may remain unnoticed under a single illumination condition.

This is one reason color approval should not depend on only one type of lighting.

Color Matching Cabinet and Metamerism

Metamerism is a common concern in textile color evaluation. Two materials may appear to match under one light source but separate visually when viewed under another.

For example, a dyed fabric may appear acceptable under daylight simulation but show a reddish or bluish difference under a store-light simulation.

This does not necessarily mean that one sample has been incorrectly dyed. It may indicate that the spectral characteristics of the two materials are different even though their colors appear similar under a particular illumination.

A Color Matching Cabinet allows the laboratory team to investigate these changes in a controlled environment.

Industries That Use Color Matching Cabinets

Although textile laboratories are a major application area, controlled color evaluation is useful across several manufacturing sectors.

Common users include:

  • Textile and yarn manufacturers
  • Garment manufacturing units
  • Dyeing and finishing facilities
  • Buying houses
  • Fabric testing laboratories
  • Printing companies
  • Paint and coating manufacturers
  • Plastic manufacturers
  • Paper manufacturers
  • Product quality-control departments

Within India’s textile sector, facilities in Tiruppur, Bangalore, Gujarat, Tamil Nadu, and other manufacturing regions can use controlled visual assessment as part of their broader quality-control procedures.

The actual testing requirement depends on the product, customer specification, and applicable quality standard.

Factors That Can Affect Color Evaluation

A laboratory may have a good instrument, but the testing procedure still needs to be controlled. Several factors can influence visual color assessment.

Important factors include:

Light source: Different illumination can change the perceived appearance of a sample.

Sample positioning: Samples should be positioned consistently so that one is not viewed at a substantially different angle.

Viewing angle: Textile surfaces can reflect or scatter light differently depending on their structure and finish.

Sample condition: Moisture, finishing treatments, surface contamination, and fabric construction may influence appearance.

Surrounding environment: Strong external light entering the viewing area can affect the comparison.

Observer: Human color perception varies, so standardized procedures help improve consistency.

Light-source age: Lamps have operating lives and their performance can change over time. Laboratory maintenance and replacement schedules should therefore be followed.

How to Improve Color Quality Control in Textile Production

A Color Matching Cabinet works best when it is integrated into a wider quality-control system rather than used as an isolated inspection step.

Manufacturers can establish color checks at multiple stages, including sample development, dyeing, fabric inspection, garment assembly, and final inspection.

A practical workflow may include:

  • Approving a physical or instrumental color standard
  • Checking lab dips before bulk production
  • Comparing bulk production against the approved standard
  • Inspecting fabric lots consistently
  • Checking trims against the garment fabric
  • Evaluating samples under more than one relevant light source
  • Recording shade observations
  • Maintaining equipment and light-source performance
  • Using instrumental color measurement where required by the specification

Good color control starts before final inspection. Detecting a shade issue during laboratory approval is generally more manageable than discovering it after garments have been manufactured.

Choosing the Right Color Matching Cabinet

The right instrument should be selected according to the laboratory’s actual testing requirements rather than simply choosing the model with the largest number of features.

Consider the following before purchasing:

1. Required light sources

Determine which illuminants are relevant to your customers and products.

2. Viewing area

The cabinet should provide enough space to compare the sample sizes normally handled by your laboratory.

3. Viewing geometry

Consistent viewing geometry helps improve repeatability between observations.

4. Controls and operation

The light-source selection system should be practical for regular laboratory use.

5. Maintenance

Check how lamps, controls, and other consumable components are maintained or replaced.

6. Applicable standards

Confirm which standards and customer-specific requirements apply to your testing procedure.

7. Laboratory workload

A production laboratory handling frequent shade approvals may require a more robust setup than a small unit performing occasional checks.

A Color Matching Cabinet should be treated as part of the laboratory’s color-management process, not simply as a lighting box.


Color Matching Cabinet vs Ordinary Lighting

The difference is mainly control and consistency.

Factor Ordinary Room Lighting Color Matching Cabinet
Lighting Variable Controlled
Light source selection Limited Multiple options
External light influence Possible Reduced
Sample comparison Less standardized More controlled
Metamerism evaluation Difficult More practical
Laboratory use Limited Designed for testing
Repeatability Can vary Better controlled

This does not mean every visual color decision requires a cabinet. However, when consistent color approval is important, a controlled viewing environment offers a more reliable approach than ordinary workplace lighting.


Why Choose Amith Garment Services?

Amith Garment Services focuses on textile and garment testing requirements, providing equipment intended for practical quality-control and laboratory applications.

For textile manufacturers, exporters, testing laboratories, and garment units, the equipment selection should match the actual testing procedure, material, production volume, and customer requirements.

Along with color evaluation equipment, a textile laboratory may require instruments for different aspects of fabric and garment performance, including strength, dimensional stability, inspection, GSM, and washing-related testing.

When selecting equipment, buyers should consider not only the machine itself but also technical specifications, operating requirements, calibration or verification needs, after-sales support, and suitability for the intended testing method.

Conclusion

Consistent color is an important part of textile and garment quality. A controlled viewing environment makes it easier for quality teams to compare approved standards with production samples and investigate color differences under different illumination conditions.

A Color Matching Cabinet is therefore a useful part of a professional textile laboratory, particularly where shade approval, buyer requirements, and metamerism control are important. When combined with appropriate testing procedures and other Textile Testing Equipment, it can support more consistent quality decisions from fabric development through final garment inspection.

For textile manufacturers and testing laboratories looking to strengthen their Fabric Color Testing and quality-control process, choosing the right Color Matching Cabinet should be based on the required light sources, testing practices, standards, workload, and laboratory conditions.

Frequently Asked Questions

A Color Matching Cabinet is used to evaluate and compare textile colors under controlled lighting conditions. It allows laboratory personnel to compare a fabric, yarn, trim, or garment against an approved reference sample. Different illuminants can also be used to identify metamerism, where two samples appear similar under one light but different under another. This makes controlled visual color assessment useful during shade approval, production inspection, and garment quality control.

D65 represents a standardized daylight illuminant and is commonly used when a daylight-like viewing condition is required for color assessment. Using a controlled D65 source provides a more consistent environment than relying on changing natural daylight. However, D65 is only one possible viewing condition. Depending on the product and customer requirement, laboratories may also evaluate samples under other relevant illuminants.

A Color Matching Cabinet allows two samples to be compared under different controlled light sources. If the samples match under one illuminant but show a noticeable difference when the light source changes, the materials may exhibit metamerism. Identifying this effect before production approval can help textile manufacturers investigate shade combinations and avoid unexpected differences during customer inspection.

Not every laboratory will have the same testing requirements, but a controlled color-viewing instrument can be valuable where shade approval and visual color consistency are important. Textile dyeing units, garment manufacturers, exporters, buying houses, and quality-control laboratories may benefit from it. The appropriate configuration depends on the materials tested, customer specifications, relevant standards, production volume, and other color-measurement methods used by the laboratory.

A Color Matching Cabinet is used to compare colors under controlled lighting. In textile testing, it helps inspectors evaluate fabric and garment shades consistently and identify differences that may appear when the samples are viewed under different types of illumination.

Samples are placed inside the cabinet and viewed under selected standardized light sources. The operator compares the production sample with a reference sample and observes whether the colors remain consistent when the illumination changes.

Metamerism occurs when two colors look similar under one light source but appear different under another. A Color Matching Cabinet helps identify this effect by allowing samples to be compared under multiple controlled illumination conditions.

Color matching helps maintain consistent shades between fabric lots, garments, trims, and approved samples. It can reduce shade-related quality problems and support more reliable inspection before finished garments are supplied to buyers.